


- Name
- Leah Wagner
- Join Date
- Jul 2015
- Location
- New York
- Posts
- 21
- Likes Received
- 13

 Shooting in Kelvin


 Reply
Reply
03-13-16 06:26 AM#2


- Name
- Megan
- Join Date
- Apr 2014
- Location
- Hastings, MI
- Posts
- 1,475
- Likes Received
- 1231

")

03-13-16 09:09 AM#3
- Name
- Leah Wagner
- Join Date
- Jul 2015
- Location
- New York
- Posts
- 21
- Likes Received
- 13
Read more: http://www.clickinmoms.com/forums/showthread.php?t=428457#ixzz43ZZ2Ut7s
COLOR BY KELVIN: A BETTER APPROACH TO WHITE BALANCE
There are a number of ways to set white balance in camera: AWB (Auto White Balance), CWB (Custom White Balance), White Balance by Preset (Sunny, Cloudy, Fluorescent, Tungsten, etc), or White Balance by Kelvin. This article will take a look at some of the most common misconceptions about white balance, as well as taking a look at one of the less commonly used approaches to white balance: White-Balance-by-Kelvin.

Myth #1: In-Camera White Balance doesn’t matter as long as you shoot RAW
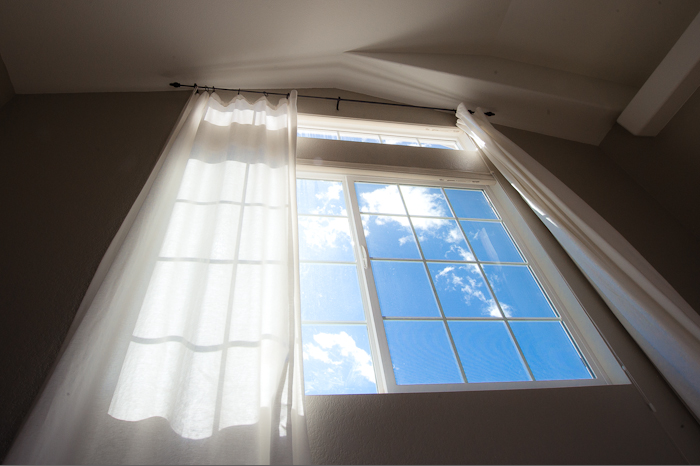
Those who shoot in RAW may pay little heed to in-camera white balance based on the commonly held belief that RAW images are infinitely flexible when it comes to white balance adjustments in the digital darkroom. The fact is that while you can adjust white balance as desired when you shoot in RAW, working with accurate white balance in camera results in more accurate exposures. Want proof? Take a look at this image. What do you expect to happen when we convert it to black and white and then adjust the white balance? The tonality does, in fact, change:
Original at 5500K (neutral daylight):

Simple grayscale conversion at 5500K:

Rollover: 2500K vs. 10,000K (no other adjustments)

The lesson? For most accurate exposure, start with an in-camera white balance that most closely approximates your intended color.
Myth #2: Accurate White Balance Always Results in Perfect Color
Sorry, but there’s more to good color than just accurate white balance; good color goes beyond the relative warmth or coolness of an image and can vary significantly from camera to camera. The good news is that you can standardize your color by calibrating your camera with a Color Checker card and importing the resulting profile into LR or ACR. We have a great tutorial for this over on the Clickin Moms photography forum.


Myth #3: You should always strive to achieve “Correct” White Balance
This is what your camera seeks to achieve in auto white balance; in my experience, the camera does extremely well in daylight situations but not as well in low light situations, with color casts, or in mixed lighting (where it tends to average). For more consistently accurate white balance, use your camera’s Custom White Balance (CWB) options to ascertain the color of light in a given situation. You can also follow a white balance chart (below) to achieve neutral gray. When “correct” white balance is set, a naturally white surface or material will, in fact, appear to be white. It can be a very effective approach in situations in which you want clean, airy color.

… But what if you want to embrace the coolness that we associate with night or the warmth of a honey hued sunset? In such scenarios, setting “correct” white balance completely strips the drama and beauty of the light. Indeed, when we shoot at sunset, very often, it’s the warmth of that “golden hour” that we find so appealing. “Unnatural” color temperatures can also be extremely effective in setting a certain atmosphere or otherwise changing the mood of a photograph. Always be keeping your own vision in mind and the way that color can come into play and enhance your work. What did the light feel like to you? What is your perception of the color setting? For example, you might be surprised to learn that although the human eye tends to perceive moonlight as bluish, it is technically a “warmer” light than daylight; as an artistic matter, I always cool down my white balance settings from neutral when shooting at night, as it best approximates how I envisioned the scene (also worth noting is that unless you’re shooting long exposures with a tripod, you’re usually NOT shooting by moonlight alone). For the science geeks among us, you may be interested to read more about the reason that we perceive night light as blue (the “the Purkinje Shift”) here.

Myth #4: White-Balance-by-Kelvin is only for math and physics nerds
Well, there may be some truth to this. Didn’t anyone tell you that PHOTOGRAPHY is only for math and physics nerds? Emotion, artistic intuition, and creativity are certainly critical to producing amazing images, but there’s no denying that you have to call upon the left side of your brain when operating your camera! The good news is that setting white balance by Kelvin is certainly no more complicated than calculating an appropriate aperture to produce your desired depth of field – in fact, I’d argue that it is painfully simple in comparison.
White-Balance-by-Kelvin: A Walk-Through
1) Reference (or memorize) a White Balance chart
All you really need to do is remember a few key lighting scenarios. As you get to know your camera and the light in your house, you may find that you need to tweak these numbers for accuracy, but this is a good jumping off point:

As a point of reference, we can also look to film, which is produced to perform best in certain types of lighting. Daylight film, for example, approximates 5500K. Tungsten Type B film, on the other hand, is 3200K. Following film’s lead, if you can only handle memorizing three temps, memorize Daylight (5500K), Average Shade (8000K), and Lamplight (2800K), and go from there.
2) Decide whether you want to neutralize or dramatize the color of the light
Once you know the color temperature of various types of light, just remember that by dialing in that color temperature, you are achieving “white” balance for the light. Thus, if you’re shooting at sunset and want to neutralize the warm hues, simply dial in the color temperature of sunset: somewhere around 2500K. If, on the other hand, you like your skin tones a little warmer or want to showcase the dramatic warmth of the lighting, select a HIGHER Kelvin value (I like to start at around 6500K when emphasizing the warmth of sunset on a clear evening — that’s approximately 4000K warmer than neutral). On the flipside, if you’d like to present something even cooler than neutral (as I do with most night images), select a LOWER Kelvin value. As a more general matter, the further you move your white balance slider from the color temperature of the existing light, the more dramatic the appearance.


3) Set your Color Temperature
So you feel confident about your knowledge of the lighting scenario and the way it would match up to the WB chart? Or you’re in a lighting situation with which you are very familiar? In these situations, odds are that you’re fine simply setting the Kelvin temperature and being on your way. I have a pretty good handle on the light in my own home at various times of day and can quickly dial in a white balance that I know will yield reliably pleasing skin tones and overall color consistent with my artistic vision; while the steps above should give you some great starting points, getting familiar with the way your camera outputs color and the ideal color temperature for your most frequent lighting scenarios is just a matter of practice and experimentation.
However, even when you begin to become very comfortable with recognizing the appropriate color temperatures in most situations, the following may still throw you for a loop:
- The color and quality of light don’t fit the chart or are otherwise unfamiliar to you (e.g., unusual indoor lighting, mixed lighting, strange weather patterns that give the sky an unusual hue)
- There is reflected color cast by painted walls, grass, clothing, etc
- You know that you want to non-neutral white balance for creative reasons
In such situations, you may not feel comfortable relying on Kelvin alone. You can certainly set, chimp, and tweak until it looks right to you – but if your camera has Live View, then you have at your disposal a wonderful tool for setting white balance. Simply turn on Live View, then adjust your color temperature and watch your adjustments live on the screen! The beauty of Kelvin is that you can fine tune your color in-camera to a much greater degree of precision than you can when using white balance presets.
Please note that mixed lighting and uneven color casts are especially tricky, and there’s generally no quick solution for managing localized discrepancies in color. I recommend getting the best white balance you can in camera, then correct the discrepancies selectively by using your selective adjustment brush in LR or ACR to lightly paint on the opposite color to neutralize the color cast or area of mixed lighting (if needed).

Now get out there and start experimenting — and welcome to a whole new world of color!
Still struggling? Have an ah-ha moment while trying this out? Want to share an image in which you’ve tried these steps out? Bring it on in the comments!
 Sarah Wilkerson, New York
CEO | CMU Instructor
website | facebook | twitter | pinterest | instagramDuke graduate and former attorney Sarah Wilkerson joined Clickin Moms as a member photographer in 2008 and quickly became a leader in the community. Together with Kendra, Sarah has led the evolution of the company’s mission, program development, and position within the greater photography community. She currently resides in New York with her Army JAG husband, three sons, one daughter, and two dogs. Sarah shoots with a Nikon D4, enjoys tilt-shift and atmospheric black and white work, and instructs CMU’s upper level composition courses: Elements of Design and Composition and Creativity.
No hay comentarios:
Publicar un comentario